How to Frame a Basement Room: Step-by-Step Guide to Creating a Sturdy and Functional Living Space with Expert Techniques
Transforming a basement into a functional living space starts with understanding how to frame a basement room, a critical process that provides the structural foundation for walls, ensuring stability and usability. Proper framing turns a cold, unfinished basement into a cozy bedroom, office, or entertainment area, enhancing your home’s value and livability.
As a home repair enthusiast, I’ve seen how precise framing prevents issues like moisture damage or uneven walls, which can lead to costly repairs if done poorly. This SEO-optimized article provides a comprehensive guide, covering preparation steps, material selection, framing techniques, moisture management, safety considerations, and finishing touches, empowering homeowners to create a durable, inviting basement room.
Preparing Your Basement for Framing
Before framing, thorough preparation ensures a solid foundation for your project. Inspect the basement for water leaks, cracks, or mold, using a moisture meter to confirm concrete walls and floors are below 15% moisture content, per building standards. Address any leaks with waterproofing sealants or drain tile to prevent future damage. Clear the space of debris and mark utility lines (electrical, plumbing) to avoid interference. Measure and plan the room layout, accounting for windows, doors, and HVAC ducts, and check local building codes for permits or requirements, such as minimum ceiling height (7 feet). Proper preparation, based on my experience, reduces errors and ensures a smooth framing process.
Choosing the Right Materials for Basement Framing
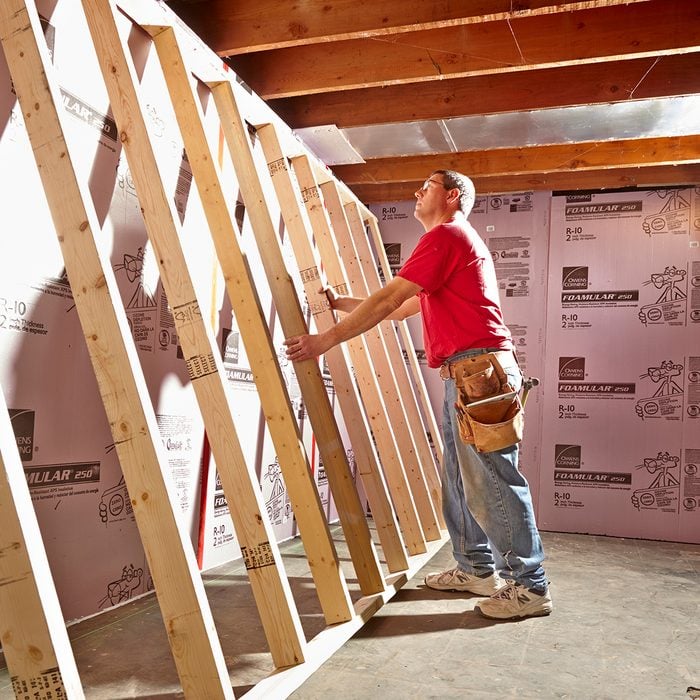
Selecting appropriate materials is key to a sturdy, long-lasting frame. Pressure-treated lumber (2×4 or 2×6) is ideal for bottom plates to resist moisture, while standard pine or spruce works for studs and top plates, offering strength and affordability, per construction guidelines. Steel studs are an alternative for damp basements, as they resist rot and warping, though they require specialized tools. Use galvanized nails or screws to prevent corrosion, and include insulation (like foam board) to improve energy efficiency by 20–30%, per energy studies. Choose materials based on your basement’s humidity and budget, ensuring durability and compliance with local codes for a reliable frame.
Step-by-Step Framing Techniques for Basement Walls
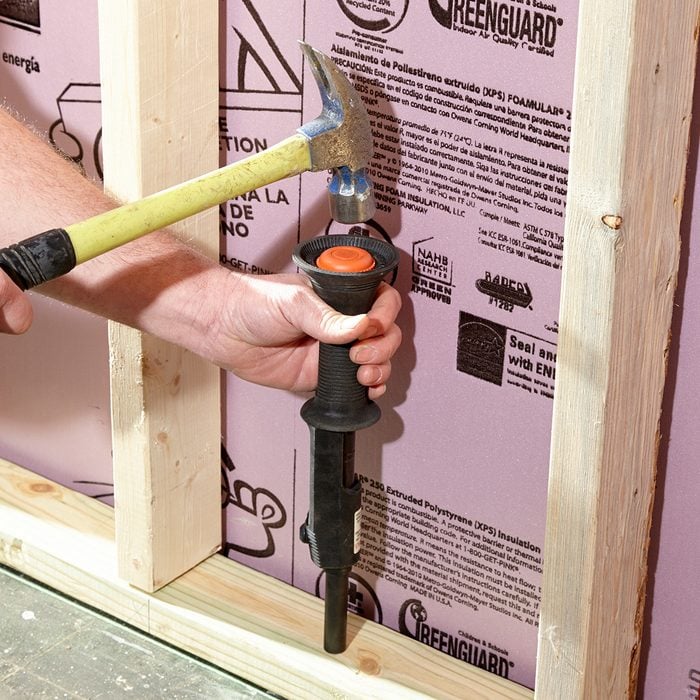
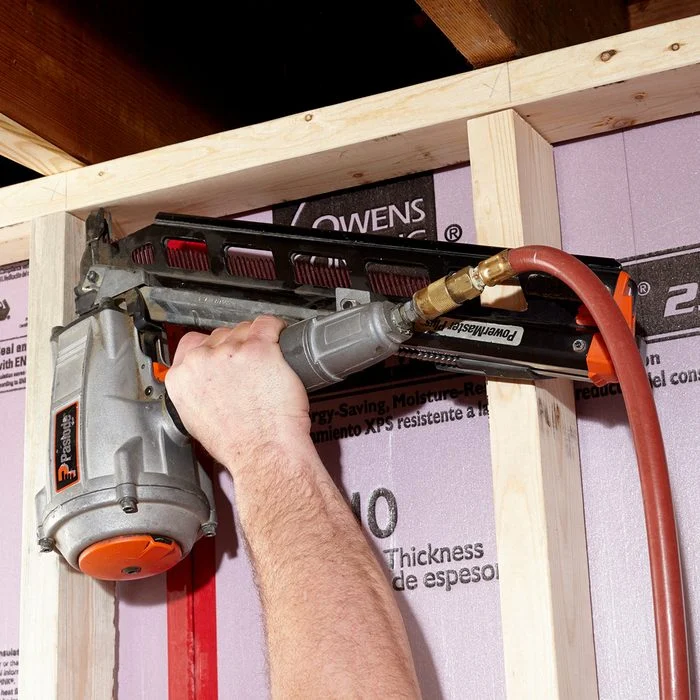
Framing a basement room involves precise techniques to build stable walls. Start with the bottom plate, securing pressure-treated lumber to the concrete floor using concrete anchors, spaced 16–24 inches apart. Install top plates aligned with the floor joists above, ensuring plumb with a level. Cut studs to fit (typically 92–96 inches for standard ceilings) and space them 16 inches on-center for strength, per building standards. Frame around openings for doors and windows, using king and jack studs for support. Secure with nails or screws, checking for squareness with a framing square. Double-check alignments and add blocking for drywall support, ensuring a sturdy frame ready for finishing.
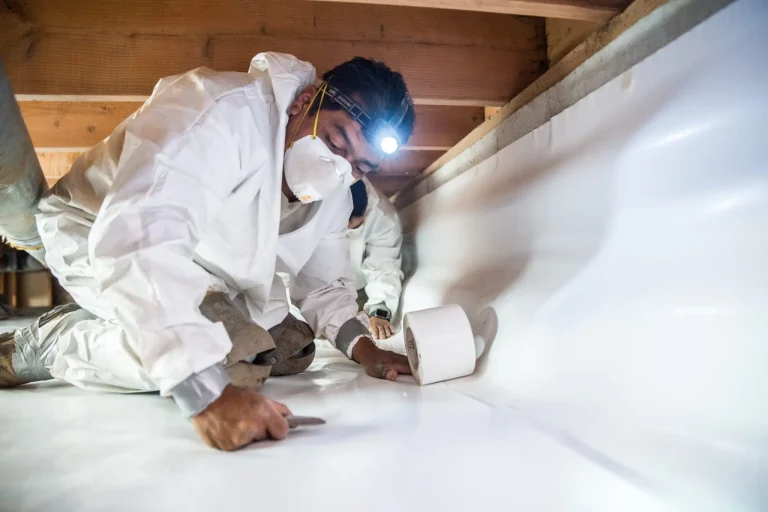
Managing Moisture During and After Framing
Moisture control is critical in basements to prevent mold and wood rot, which can develop within 24–48 hours, per environmental studies. Install a vapor barrier (6-mil polyethylene) behind the frame before drywall to block moisture from concrete walls. Use foam board insulation between studs to reduce heat loss and condensation. Ensure proper ventilation by leaving a 1-inch gap between the frame and concrete walls, allowing air circulation. After framing, run a dehumidifier to maintain humidity below 50%, and inspect regularly for dampness using a hygrometer. These steps, drawn from my field experience, keep your framed room dry and durable.
Safety Considerations for Basement Framing
Safety is paramount when framing a basement room. Wear protective gear, including gloves, safety glasses, and a dust mask, to guard against sawdust or concrete debris. Use power tools like drills or saws with caution, ensuring stable footing on potentially damp floors. Check for electrical hazards by confirming power is off when working near wiring, using a voltage tester for safety. Ensure adequate lighting to avoid missteps, and ventilate the space to reduce dust inhalation. Follow local building codes for stud spacing and fire-blocking to meet safety standards. These precautions, based on years of hands-on work, minimize risks and ensure a secure framing process.
Finishing Touches for a Polished Basement Room
Once framing is complete, finishing touches prepare the room for use. Install insulation (fiberglass or foam) between studs to improve thermal efficiency and soundproofing, reducing noise by 15–20%, per acoustic studies. Hang drywall over the frame, securing with screws every 12 inches, and tape joints for a smooth surface. Add trim around doors and windows for a polished look, and seal gaps with caulk to prevent air leaks. Consider moisture-resistant drywall for added protection in damp areas. These steps transform your framed walls into a functional, attractive space, ready for paint, flooring, or decor to complete your vision.
Conclusion: Build a Solid Foundation with Proper Basement Framing
Mastering how to frame a basement room is the cornerstone of creating a functional, inviting living space that enhances your home’s value and comfort. By preparing thoroughly, choosing durable materials, applying precise framing techniques, managing moisture, prioritizing safety, and adding finishing touches, homeowners can craft a sturdy, long-lasting room. With careful planning and execution, informed by years of home repair experience, your basement can become a cozy retreat or versatile space. Start framing, follow these expert steps, and transform your basement into a durable, welcoming addition to your home.